The OpenStreetMap allows you to display your events in a map to make it easy for your event attendees to find an event location.
It is a good alternative to Google Maps addon as it comes with free API access with robust features.
Installing the plugin :
The installation process is the same for all the addons, offered by WP Event Manager. They can be both installed automatically and manually.
Automatic Installation : You can install the plugin from the backend of your WordPress. Click Here to see how you can install the plugin automatically.
Manual Installation : You can also install the plugin manually using SFTP or FTP tools. Click Here to see how you can install the plugin manually.
OpenStreetMap Settings :
The general settings section of the OpenStreetMap addon helps you add your preferences to the plugin.
Here are the steps to follow to access the general settings section :
1. Go to wp-admin.
2.Click on Event Manager.
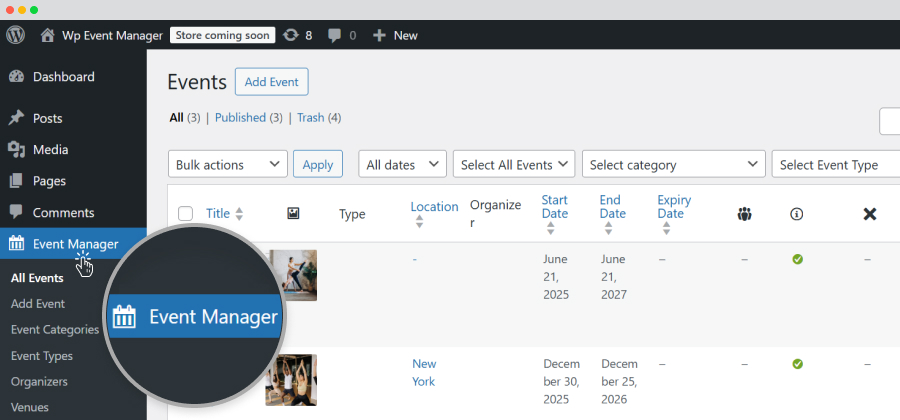 3. Select “Settings”.
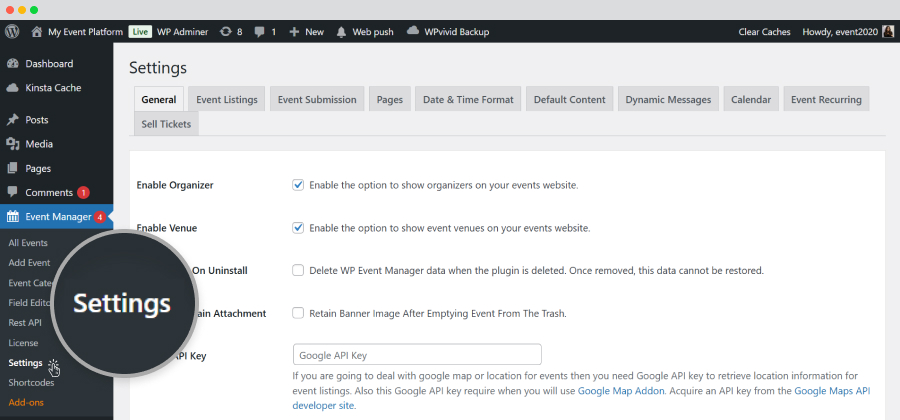
4. The setting option contains multiple tabs and you need to click on the ones in which you will work.
OpenStreetMap General Settings :
To access the General Setting options, you need to click on the OpenStreetMap General Settings tab at the settings section.
Here, you will find the following options:
Geocoding API Provider : In this section, you need to choose the Geocoding API provider for the OpenStreetMap. This API helps the software point out various locations on the map, track nearby places for events, and perform multiple other location-related functions. 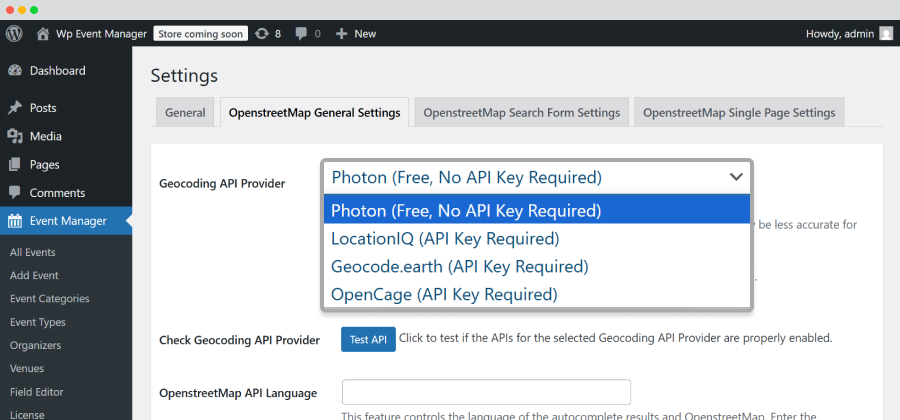
Here, you will get three options:
Photon – A free geocoding API that does not require an API key. Learn more.
LocationIQ – It requires an API key and offers location accuracy. Learn more.
Geocode. earth – It also requires an API key. Learn more.
OpenCage – Offers better accuracy and needs an API key. Learn more.
Select the Photon (free, no API required) option
Check Geocoding API Provider : Here, by clicking on the Test API button, you can verify if the free Photon API is functioning properly.
Openstreet API Language : This option determines the language that will show the address autocomplete results and openstreetmap. You have to fill in the box with your preferred language.
The list of languages is also provided here.
Openstreet Address Autocomplete(For Backend Submission Form) : Check the box beside the option to display suggested results by Openstreet when typing an address in the location field of the new/edit WP Event Manager Openstreet Maps screen.
Openstreet Address Autocomplete(For Frontend Submission Form) : Check the box beside the option to Display suggested results by Openstreet when typing
an address in the location field of the new/edit Openstreet Maps form in the front end.
Autocomplete Country Restriction : This option allows you to restrict specific countries from using the autocomplete result feature. You can leave the box empty to allow all countries.
Location Marker : You need to add the URL of the OpenStreetMap icon or marker which represents the location on the map.
Select Tooltip Style : Here you need to select your preferred tooltip style from the given options: Default, Style 2 and Style
After adding all your preferences, you need to click on Save Changes.
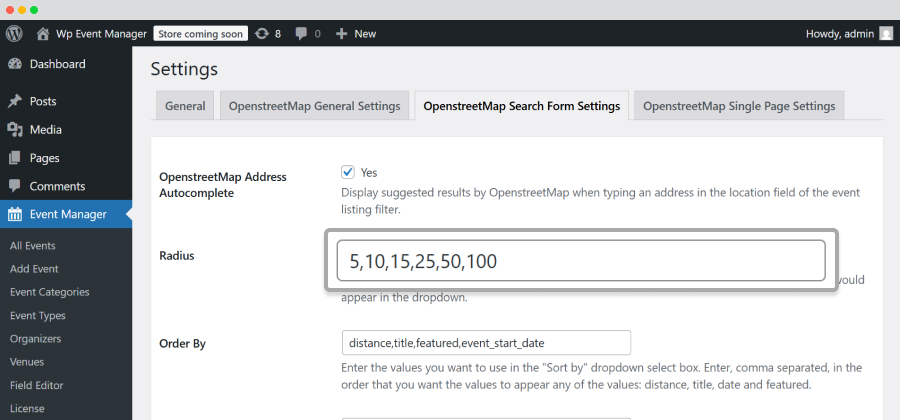
OpenStreetMap Search Form Setting :
Just like the General Setting tab, you need to click on the OpenStreetMap Search Form Setting tab at the settings section to add your preferences to it.
Here, you will get the following options:
OpenStreet Address Autocomplete : By enabling this option, you allow the plugin to suggest addresses when a user starts typing an address in the location field of the event listing filter.
This particular feature saves a visitor's time and energy by eliminating the need to type an entire address. As soon as the visitor enters a few letters of a particular address, a list of all the possible addresses are displayed instantly as shown in the below-mentioned screenshot.
Radius : It displays all the events searched within a specific radius. Here you need to Enter the first value as a default radius and proceed with multiple other values,separated by a comma, that would appear in the dropdown while selecting radius in the event listing filter.
 Within Miles/Kilometers : It displays events within the specified range of miles or kilometers to the location mentioned. If you are looking for events within a specific distance from the location you entered into the “Location” field in the search form, then you simply have to select options from within and miles/kilometers fields and all the related events within your selected distance will appear so you can easily find the events that are relevant to what you were looking for.
Order by : In this section, you need to add the values you would like to include in the Sort by dropdown menu. The values must be separated by commas. Order : It allows users to filter events by distance in ascending or descending order.
 Select Asc or Desc from the Order dropdown to let people filter events based on distance in ascending or descending order.
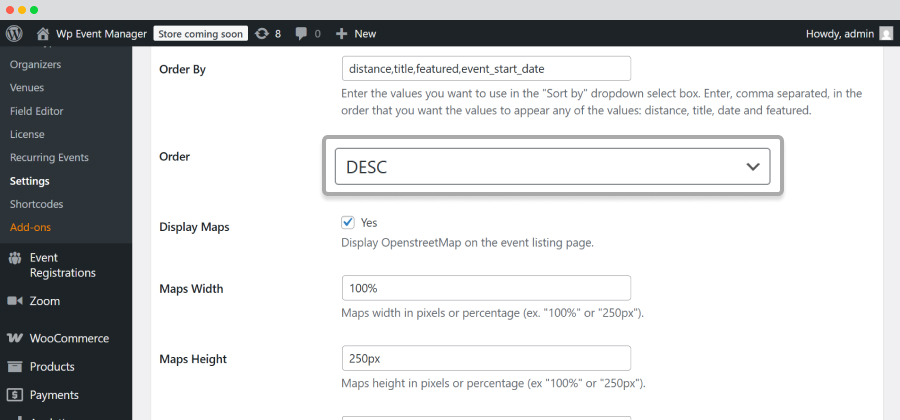
Display maps : Enable this option if you would like to display the OpenStreetMap on your event listing page.
Maps Width : Here you can mention your map width in percentage or in pixels. (ex. "100%" or "250px").
Maps Height : This also can be mentioned in percentages or in pixels.
Maps Type : Select your preferred Maps type from the dropdown menu containing options like Satellite, roadmap, hybrid, etc.
Enable Maps Scroll Wheel Control : Enable this option to Zoom in or Zoom out locations in a map through the mouse scroll wheel.
After adding your preferences in the OpenStreetMap search form setting section, click on Save Changes.
OpenStreetMap Single Page Settings :
Display Maps : Enable this option to display an OpenStreetMap in a single event page.
Maps Width : Mention the width of your map in pixels or percentages.
Maps Height : Mention the height of the map in pixels or percentages.
Maps Type : Choose your preferred map type from the dropdown containing options like roadmap, satellite, hybrid etc.
Enable Maps Scroll Wheel Control : Enable this option to allow users to zoom in and out any location on the map.
Zoom Level : You can mention your preferred Zoom level from 0(world view) to 18( street level).
After adding your preferences, you can Save Changes.
Frontend Operations of OpenStreetMap :
When you open the frontend of your event listing page, it will show the following things based on the changes you made in the backend:
Detailed event lists with multiple filters.
You can search for events by typing the name of it or adding a specific location to the location bar. After that click on the Find Events button.
For additional filters, you need to click on the filter icon, present right beside the location bar and you will find additional filtering options like event dates, types,categories, within, miles and order by.